Adding and verifying your website in Bing Webmaster Tools is a very important step for improving your site’s visibility in Bing’s search results.
In this guide, I’ll walk you through both processes, whether you want to import your site from Google Search Console or set it up manually.
I’ve broken down each verification method into simple steps, so you can choose the one that works best for your situation.
Follow my instructions to get your website properly set up in Bing Webmaster Tools and ready for optimization.
Before You Start
Before diving into the setup process, let me walk you through a few essential things you’ll need. This will help ensure you can smoothly add your website to Bing Webmaster Tools without any interruptions.
1. Live Accessible Website
Your website needs to be up and running, meaning anyone can visit it through a web browser. This might seem obvious, but I’ve seen many try to add websites that are still in development or hidden behind maintenance modes. Bing needs to access your site to verify ownership, so make sure it’s publicly accessible.
2. A Microsoft Account
You’ll need a Microsoft account to access Bing Webmaster Tools. Don’t worry if you don’t have one yet; you can use any existing Outlook, Hotmail, or Microsoft-affiliated email.
If you need to create a new account, it only takes a few minutes, and it’s completely free. Click here
3. Website Access Credentials
This is really important, you’ll need administrative access to make changes to your website. Depending on which verification method you choose later, you’ll need either access to your website’s files, HTML code, or DNS settings.
Don’t worry about choosing which one yet; I’ll explain each method in detail, and you can pick the one that works best for you.
4. Google Search Console (Optional)
If you already have your website verified in Google Search Console, this can make the process much easier. You can easily import your site directly from Google Search Console to Bing Webmaster Tools.
But don’t worry if you don’t have this; it’s completely optional, and I’ll show you other ways to add your site.
With all that out of the way, let me teach you how to add your website to Microsoft Bing Webmaster Tool.
How to Add your website to Bing
Adding your website to Bing Webmaster Tools is a straightforward process, and I’ll show you two different methods.
The first method uses Google Search Console for a quick import, while the second involves manual verification.
Let’s start with the simpler Google Search Console method.
Method 1: Import from Google Search Console
If you already have your website verified in Google Search Console, this is the fastest way to add your site to Bing Webmaster Tools.
Bing has partnered with Google to make this process seamless, allowing you to import your verified properties directly.
Step 1: Log in and Access Import Feature
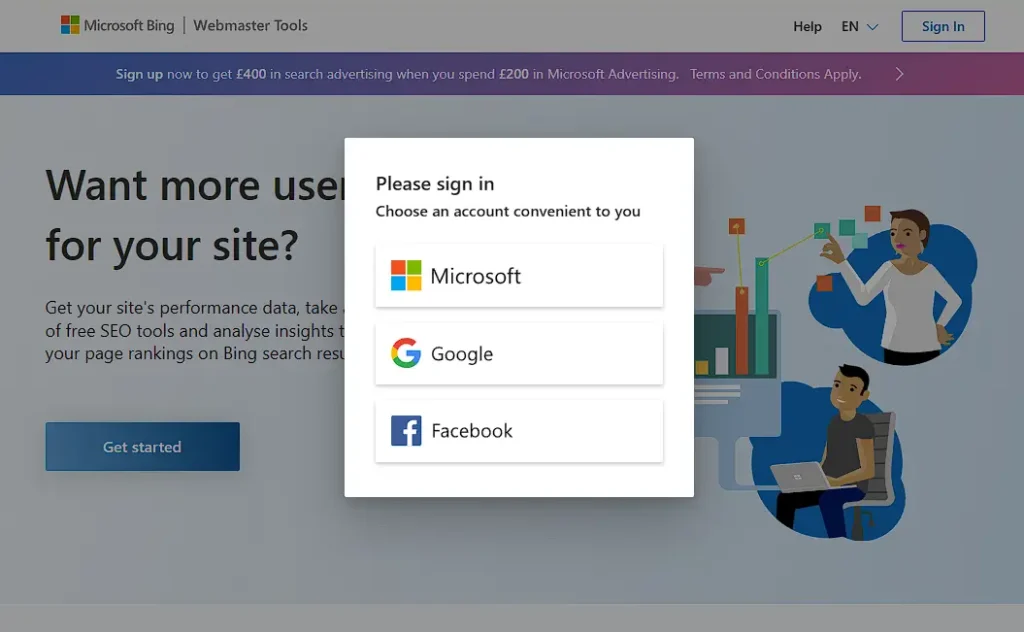
First, you need to sign in to Bing Webmaster Tools with your Microsoft account, Google, or Facebook.
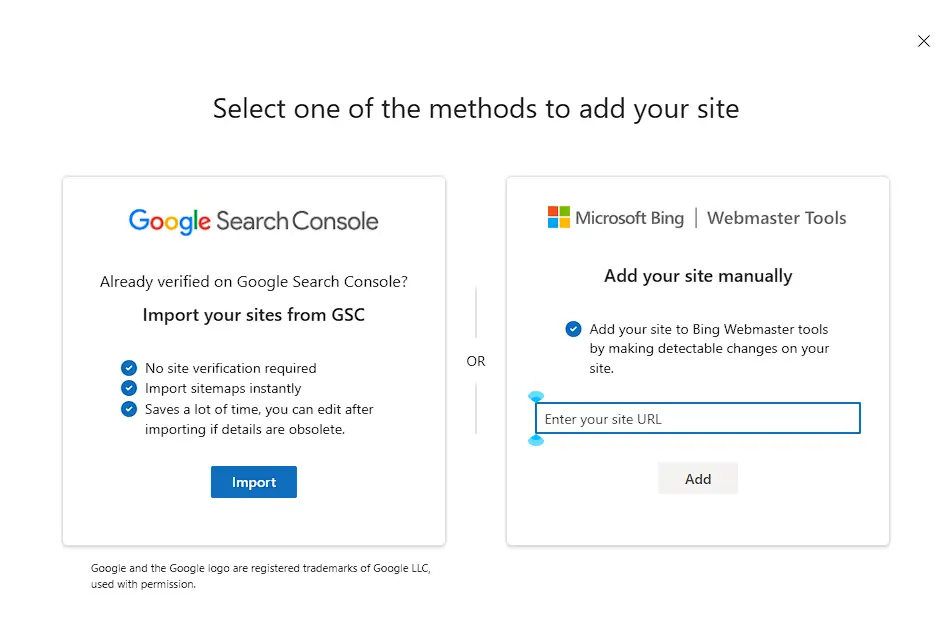
On the dashboard, look for the “Import from Google Search Console” button. It’s usually prominently displayed on the main page, making it easy to spot. Click this button to start the import process.
Step 2: Connect Your Google Account
Once you click the import button, you’ll be asked to sign in to your Google account. Select the account that has access to your Google Search Console properties.
When you see permission prompts, you can safely approve them. Bing only needs view-only access to your Google Search Console data.
What Gets Imported?

When you connect your Google Search Console account, Bing will only import the list of your verified sites, allowing you to choose which ones you want to add to Bing Webmaster Tools.
The import process also includes your submitted sitemaps to help Bing understand your site structure, but no analytics or site performance data will be transferred.
Bing maintains this connection to periodically validate your verification status and keep your sitemap information current.
The view-only access ensures a secure and limited data exchange between the two platforms.
Step 3: Select Your Website
After connecting your Google account, you’ll see a list of all your verified websites from Google Search Console.
Simply check the box next to the website you want to import to Bing Webmaster Tools. You can select multiple sites if you’re managing more than one website.
Step 4: Confirm and Complete
Click the “Import” button to finish the process. Bing will automatically verify your website since it’s already verified in Google Search Console.
Within a few minutes, your website will be added to your Bing Webmaster Tools dashboard, ready for you to explore its features.
Method 2: Manual Addition
If you don’t have Google Search Console or prefer to set up your website directly in Bing Webmaster Tools, don’t worry.
The manual process is just as effective, though it requires a few more steps. I’ll guide you through each verification option so you can choose the one that works best for your situation.
Step 1: Access the Add Site Feature
Log into Bing Webmaster Tools with your Microsoft account. On the dashboard, look for the “Add Site” button.
Click it, and you’ll be taken to a page where you can enter your website’s URL. Make sure to include the correct protocol (http:// or https://) when entering your URL.
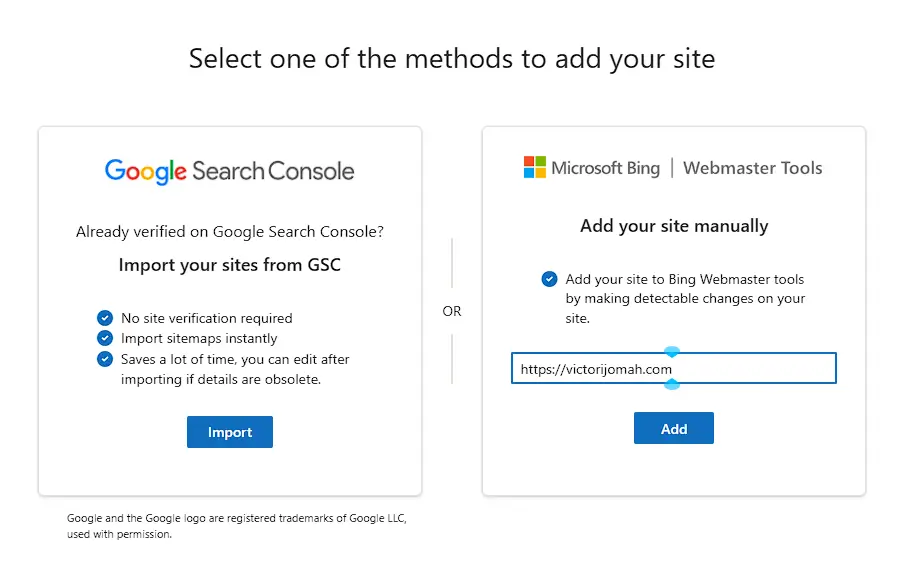
Step 2: Enter Your Website URL
Type in your complete website URL. For example, if your website is “example.com,” make sure to enter it as “https://example.com” (or http:// if you’re not using SSL). Click “Submit” after entering your URL.
Step 3: Choose Your Verification Method
After submitting your URL, Bing will present you with three verification options:
- XML File Verification
- HTML Meta Tag
- CNAME DNS Record
How to Verify your Website on Bing Webmaster Tools
Verifying your website with Bing Webmaster Tools is a very important step in improving your site’s visibility on Microsoft’s search engine.
This verification process proves you’re the legitimate owner or administrator of your website, giving you access to valuable SEO tools, analytics, and site performance data.
Verify with XML File
This verification method requires you to upload a small XML file to your website’s root directory. Here’s how it works:
Step 1: Download the XML file
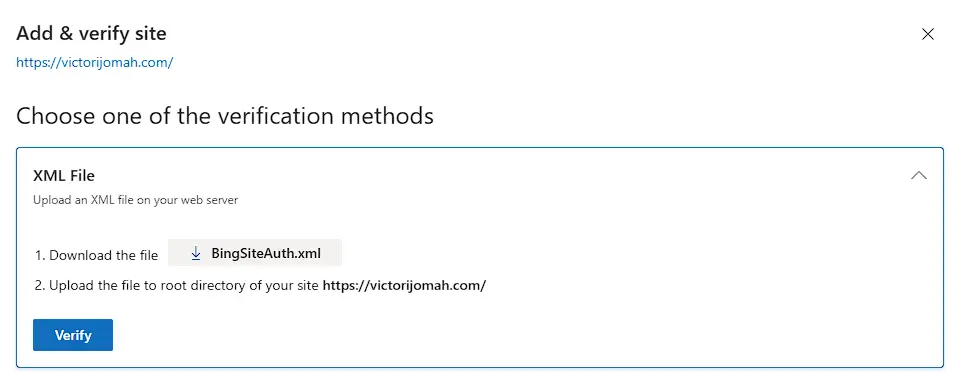
Once you select the XML file verification method, Bing will generate a unique BingSiteAuth.xml file for your website. Click the “Download” button to save this file to your computer.
Don’t modify the file content; it contains a specific verification code that Bing will check.
Step 2: Upload to Your Website
Upload the BingSiteAuth.xml file to your website’s root directory. This is typically the same location where you find your homepage file (index.html).
For example, if your website is “example.com,” the file should be accessible at “example.com/BingSiteAuth.xml.”
Step 3: Verify Upload
Before clicking the verification button, make sure you can access the file through your web browser.
Try visiting yourwebsite.com/BingSiteAuth.xml, if you see the XML content, you’ve uploaded it correctly. Then return to Bing Webmaster Tools and click “Verify” to complete the process.
Verify Your Site Using HTML Meta Tag
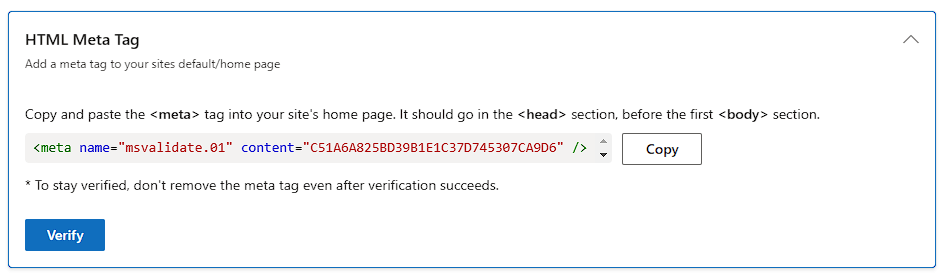
The meta tag method involves adding a small piece of code to your website’s HTML header. This is particularly useful if you’re comfortable editing your site’s code or using platforms like WordPress.
Step 1: Get Your Meta Tag
Bing will provide you with a unique meta tag that looks something like this:
<meta name="msvalidate.01" content="YOUR_UNIQUE_CODE" />Copy this entire line of code carefully; every character matters for verification.
Step 2: Add to Your Website’s Header
Add this meta tag to the <head> section of your website’s HTML code. If you’re using WordPress, you can add this through your theme settings or by using a header and footer plugin.
Make sure it’s placed before the closing </head> tag.
Here’s a guide on the methods I personally use in adding codes to my wordpress sites.
Step 3: Save and Verify
After adding the meta tag to your website’s header, save all your changes and refresh your website to make sure everything is live.
Once you confirm the meta tag is properly added, head back to Bing Webmaster Tools and click the “Verify” button. Bing will then check your website for the meta tag and confirm your ownership.
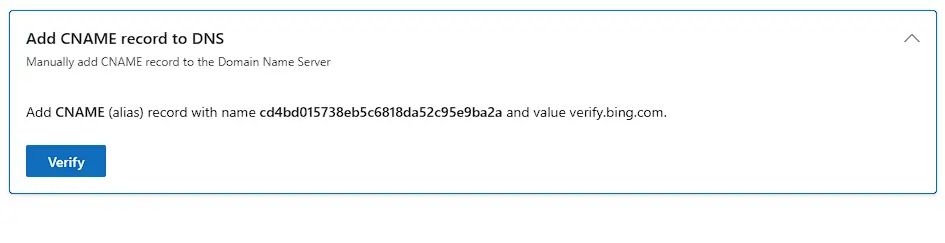
Verify Your Site Using CNAME DNS Record
The DNS verification method is perfect if you manage your domain through a domain registrar like GoDaddy, Namecheap, or similar services.
While it might take longer due to DNS propagation time, it’s a reliable method that doesn’t require any changes to your website files.
Step 1: Get Your DNS Record Details
When you select the DNS verification method, Bing will provide you with two pieces of information:
- A host name to create the CNAME record
- A CNAME value to verify your ownership
Step 2: Add the CNAME Record
Log into your domain registrar’s control panel and navigate to your DNS settings. Create a new CNAME record using the host name and value provided by Bing.
Double-check that you’ve entered both pieces of information exactly as shown; even a small typo can prevent verification.
Step 3: Wait and Verify
DNS changes typically take time to propagate across the internet. Wait about 15-30 minutes (though it can sometimes take up to 48 hours), then return to Bing Webmaster Tools and click the “Verify” button.
If verification fails, wait a bit longer and try again, as your DNS changes might still be propagating.
FAQs
What are Bing Webmaster Tools?
Bing Webmaster Tools is a free platform provided by Microsoft that helps website owners monitor their site's performance in Bing search results. It offers valuable insights about your website's search visibility, provides SEO reports, allows you to submit sitemaps, and helps identify potential technical issues that might affect your site's ranking.
How long does Bing Webmaster Tools verification take?
The verification time varies depending on your chosen method. The Google Search Console import and HTML meta tag methods typically verify within minutes. XML file verification usually takes 5-10 minutes. DNS verification can take anywhere from 30 minutes to 48 hours due to DNS propagation times.
Do I need both Google Search Console and Bing Webmaster Tools?
Yes, it's recommended to use both tools since Google and Bing are separate search engines with different data and insights. While Google dominates search traffic, Bing still accounts for a significant portion of searches, especially in markets like the US. Having both tools gives you a complete picture of your website's search performance.
Is Bing Webmaster Tools free?
Yes, Bing Webmaster Tools is completely free to use. Microsoft provides all its features, including site verification, SEO reports, keyword research tools, and site analytics, at no cost to website owners and managers.
What is the difference between Bing Webmaster and Google Search Console?
While both tools serve similar purposes, they focus on different search engines. Bing Webmaster Tools provides data specifically for Bing and Yahoo searches, while Google Search Console focuses on Google search performance. Each platform has unique features, for example, Bing offers a built-in SEO analyser and keyword research tool, while Google Search Console provides more detailed search performance metrics.
Do I need to verify my website again if I change from HTTP to HTTPS?
Yes, you'll need to verify your website again when switching from HTTP to HTTPS because they're treated as separate properties. However, if you're using DNS verification, you might not need to reverify since the DNS record remains unchanged.
Can I change verification methods later?
Yes, you can change your verification method at any time. Simply go to your site settings in Bing Webmaster Tools, select a new verification method, and follow the steps. Your site will remain verified through the old method until the new one is successfully implemented.
Will I lose my verification if I change my website’s hosting/platform?
It depends on your verification method. DNS verification typically remains intact during hosting changes. However, if you're using HTML meta tag or XML file verification, you'll need to ensure these verification markers are transferred to your new hosting environment or platform to maintain verification.
My Recommendations
After helping numerous website owners set up their Bing Webmaster Tools, I’ve found that choosing the right verification method can make a big difference. Here’s my practical advice to help you decide:
If you’re already using Google Search Console, start with the import method. It’s the quickest way to get set up, and you’ll benefit from maintaining consistent verification across both search engines.
For WordPress users or those with easy access to their site’s header, the HTML meta tag method is your best bet.
It’s straightforward to implement and doesn’t require file uploads or DNS changes. Plus, even if you redesign your website later, the meta tag usually stays in place.
For those managing multiple websites or working with development teams, the XML file method provides a clean, separate verification file that’s easy to track and manage.
The DNS method, while it takes the longest due to propagation time, is particularly useful if you’re setting up a new website or can’t modify your site’s files.
It’s also the most permanent solution, as it won’t be affected by website changes or CMS updates.
Remember, no matter which method you choose, verification is just the beginning.
Once verified, take time to explore Bing Webmaster Tools’ features to improve your site’s performance in Bing search results.
Disclosure: My content is reader-supported. If you click certain links, I may earn a commission at no extra cost to you. Your support helps keep my blog running. Learn more about my funding and editorial process.